Contribution by Josh Kinser
The world seems to have turned upside down over the past week. Quarantine mandates, food and TP shortages – it is all something that most of us have never experienced. I’ve hit the grocery stores 3 times in the last few weeks just trying to grab fresh fruits and veggies and a few other staples we needed. Meat has been completely wiped out – hardly anything left. But, what had me thinking is what I saw on all three trips (plus what everyone else has reported) – all meat gone but plenty of brisket and ribs.
I think most are intimidated by cooking either, but especially brisket. And many probably don’t have a good pit to cook these in. In this period of quarantine we have extra time, and what better opportunity to try your first brisket or rack of ribs? Trust me, it’s easier than you think! For the purpose of this article we will focus on brisket and follow up with a rib article. I am not a chef but I’ll provide links and resources from higher brisket authorities. I’ll go over what has worked best for me and some mistakes I have made. Don’t worry about making the perfect brisket – let’s be honest, even an imperfect brisket is pretty dang good! Freeze what your family can’t finish or share with neighbors. Let’s go over the important factors.
Brisket Cuts
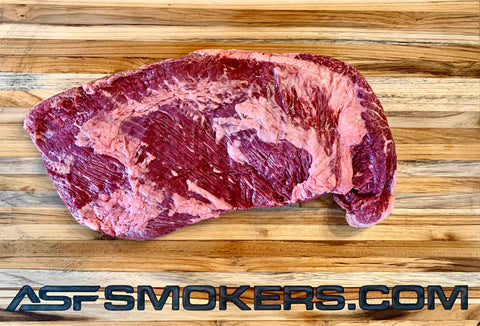
Most of the time, your H-E-B (or other grocery store) will have different choices – not trimmed, deckle fat removed or fully trimmed (ready to season and go). H-E-B has several great video tutorials that go through the process of trimming your brisket. We will provide those links at the end of this article to help you nail it step by step.
Seasoning
Before seasoning, I like to pour a little avocado oil on the brisket. This helps in the tenderizing process and helps the seasoning adhere better to the meat. Here in Texas, we have more brisket seasonings than you can imagine. If this is your first one, you might want to go with a readymade one. There are plenty of other recipes out there, but I tend to prefer the H-E-B – Texas Originals Brisket Rub. (photo) I also have had great luck with Adams and the Bolner Fiesta brisket rubs. Whatever you decide to go with, make sure you put some disposable gloves on and massage the rub into the meat. Don’t just sprinkle some on. Once you’ve massaged seasoning over the entire brisket, leave it in the fridge for 48 hours. This really helps tenderize and lets that flavor work itself into the meat.
Thermometer
Get yourself a good, leave-in thermometer that you can monitor. You don’t want to keep opening the pit and letting the heat out to check the temperature of the meat. You can find these easily online or in the cooking/grilling section of most grocery stores.
Pit or Pellet Grill?
I’ve cooked briskets on both with great success. I prefer, when I have the time and the ability to focus, to smoke a brisket with real wood and really enjoy the process of it. I also have 3 fairly young kids, so when I don’t have the time to babysit the grill, I also enjoy the help a pellet grill provides. I have an ASF Sirloin Pellet Grill and the ASF Oven Up BBQ Pit. I enjoy cooking on both but prefer, when I can, the flavors out of a real pit. The Oven Up has three racks that pull out and a firebox that doubles as a grill. A well-made pit is key to keeping heat flowing the right way with consistent temperatures and the Oven Up is a great example of this.
Wood/Pellets
I prefer these woods or pellets for smoking brisket.
Oak – Hickory – Mesquite – Maple – Cherry – Apple - Pecan
Fat Up or Fat Down?
This is a classic debate. I’m not going to say one is right and one is wrong. If you want to go down that rabbit hole, click on the link below or do a few Google searches on it. From everything I have learned from way better brisket masters than I, it should be “Fat Down” if your heat is coming from the bottom.
Temperature
Most folks like to have their pits at 225. Every brisket is different and will cook slightly different – no two briskets cook the same and that’s not just about size and shape either. Most folks like to bring that brisket up to an internal temp somewhere between 200 and 205. Some pitmasters swear by 201 or that 202 is the perfect temp.
When the brisket reaches somewhere between 150-170 degrees you will run into the issue that throws most folks – the pause. The moisture in the meat starts to evaporate and cools the meat while you are trying to heat it up, drying it out in the meantime and adding hours to the cook time. This is where the “Texas crutch” comes in to save your butt, wrap it up! I would suggest using pink butcher paper over aluminum foil. Butcher paper is cheaper and allows the meat to still breath a little. Keeping a pan of water in the smoker will help too.
Once you reach your internal temp (I’d suggest sticking to 200 for your first one), you’ll want to take your brisket it off and wrap it and let it rest. I prefer to wrap it in foil (keeping the thermometer in) and place it in a cooler. Let that brisket rest for about 2-3 hours or whenever it cools down to 160-170. Then you are ready to slice and enjoy.
More about Brisket Stall
How To Smoke Texas Brisket w/ Chef Scott
H-E-B Brisket Guide


